Getting Started with BananaPI Linux
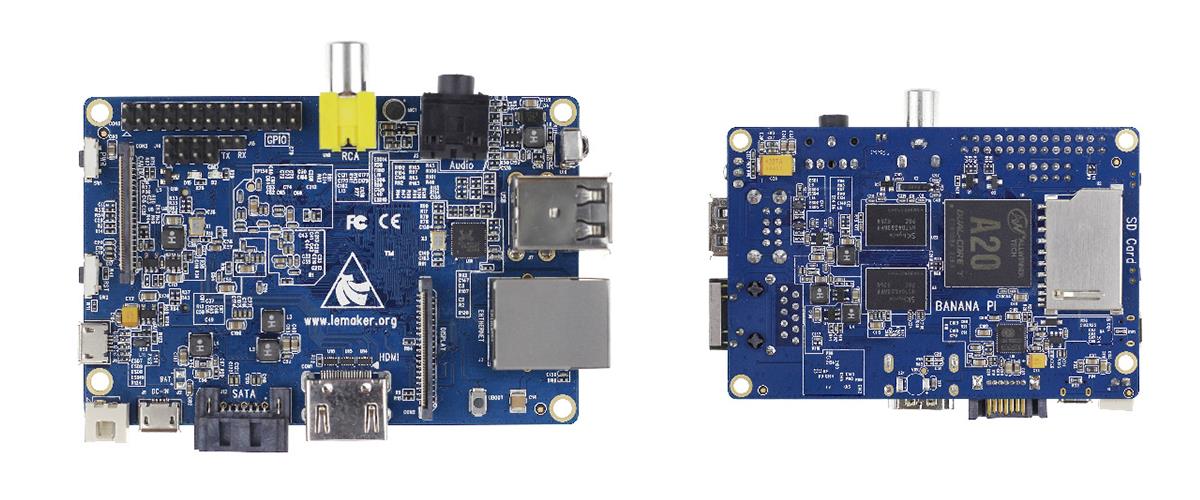
Single board computers have been very popular in the community due to their low price and high flexibility and Banana Pi board, which is powered by Allwinner A20, is no exception. In this blog post you will find everything you need to prepare a Banana Pi Linux image from scratch.
Board setup
I have a Banana Pi (Foxconn Super Pi clone actually) with a 5″ capacitive touchscreen which is connected to RGB pins with an adapter board. Find the scheme and details of the board here. For internet connectivity i use TL-WN725N (v3) wifi dongle that has RTL8188EU chip.
Build environment
Build OS
To make everything clear, it is important to prepare the same working environment as instructed here. So I started on a fresh Ubuntu 16.04.3 64bit installation and you should do the same (VMware is also possible).
Required packages
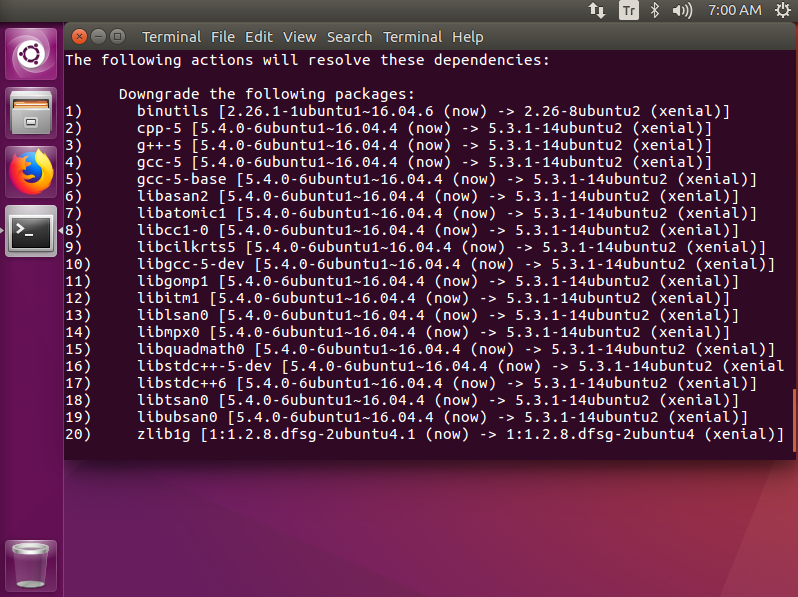
On the version of Ubuntu I am currently using have some problems installing the packages and this is why I use aptitude to solve the dependency problems.
sudo apt-get update
sudo apt-get install aptitude
Now run the following to prepare the environment.
sudo aptitude install build-essential u-boot-tools binutils-arm-linux-gnueabihf gcc-4.8-arm-linux-gnueabihf-base g++-4.8-arm-linux-gnueabihf gcc-arm-linux-gnueabihf cpp-arm-linux-gnueabihf libusb-1.0-0-dev git wget fakeroot kernel-package zlib1g-dev libncurses5-dev device-tree-compiler libssl-dev
Here aptitude solves the problems and we must choose where no package stays “not installed”. The solution below works perfect for me.
 If everything is ready, let’s go ahead to the image building.
Banana Pi BSP building
The most important parts are Uboot bootloader and kernel building. Run the following to get the repositories for u-boot v2016.09, stable Linux Mainline Kernel v4.15 and firmware files that are necessary for some drivers to operate.
git clone git://git.denx.de/u-boot.git --depth 1 -b v2016.09
git clone git://git.kernel.org/pub/scm/linux/kernel/git/stable/linux-stable.git --depth 1 -b v4.15
git clone git://git.kernel.org/pub/scm/linux/kernel/git/firmware/linux-firmware.git --depth 1
U-boot compilation
The required GCC is version 4.8 for this version of u-boot. This is why we need to hack the Makefile.
sed -i 's/$(CROSS_COMPILE)gcc-4.8/$(CROSS_COMPILE)gcc/g' ~/u-boot/Makefile
sed -i 's/$(CROSS_COMPILE)gcc/$(CROSS_COMPILE)gcc-4.8/g' ~/u-boot/Makefile
Now is the part for LCD and touch settings. Note that the configuration is given for the adapter board of which details are given above.
cat<<END >> ~/u-boot/configs/Bananapi_defconfig
CONFIG_VIDEO_LCD_MODE="x:800,y:480,depth:24,pclk_khz:30000,le:40,ri:40,up:29,lo:13,hs:48,vs:3,sync:3,vmode:0"
# CONFIG_VIDEO_LCD_BL_PWM_ACTIVE_LOW is not set
CONFIG_VIDEO_LCD_POWER="PH12"
CONFIG_VIDEO_LCD_BL_EN="PH8"
CONFIG_VIDEO_LCD_BL_PWM="PB2"
END
Finally, run the following to compile the bootloader.
cd ~/u-boot

export CROSS_COMPILE=arm-linux-gnueabihf-
make clean
make Bananapi_defconfig
make -j8
If everything is fine, you can find the u-boot image at ~/u-boot/u-boot-sunxi-with-spl.bin.
Linux mainline kernel for BananaPi
Mainline kernel compilation takes place with respect to defconfig file. Place the this bpi_defconfig file to path: ~/linux-stable/arch/arm/configs/bpi_defconfig without file extension.
Edit the device tree file at: ~/linux-stable/arch/arm/boot/dts/sun7i-a20-bananapi.dts for touchscreen settings. Add the following after i2c2:
&i2c3 {
	status = "okay";
	pinctrl-names = "default";
	pinctrl-0 = <&i2c3_pins_a>;
	edt: edt-ft5x06@38 {
		compatible = "edt,edt-ft5x06", "edt,edt-ft5206";
		reg = <0x38>;
		pinctrl-names = "default";
		pinctrl-0 = <&edt_ft5x06_pins_a &edt_ft5x06_pins_b>;
		interrupt-parent = <&pio>;
		interrupts = <7 9 IRQ_TYPE_EDGE_FALLING>;
		touchscreen-size-x = <800>;
		touchscreen-size-y = <480>;
		//touchscreen-inverted-x;
		//touchscreen-inverted-y;
		//touchscreen-swapped-x-y;
	};
};
Then add the following into section pio:
	edt_ft5x06_pins_a: ft5@0 { // interrupt
		pins               = "PH9";
		function           = "irq";
		drive-strength     = <20>;
		bias-pull-up;
	};

	edt_ft5x06_pins_b: ft5@1 { // reset-gpios
		pins               = "PH7";
		function           = "gpio_out";
		drive-strength     = <20>;
		bias-pull-up;
		output-high;
	};
To activate ft5x06 touchscreen and RTL8188EU wifi driver:
sed -i 's/# CONFIG_TOUCHSCREEN_EDT_FT5X06 is not set/CONFIG_TOUCHSCREEN_EDT_FT5X06=y/g' ~/linux-stable/arch/arm/configs/bpi_defconfig
sed -i 's/CONFIG_RTLWIFI_USB=m/CONFIG_RTLWIFI_USB=y/g' ~/linux-stable/arch/arm/configs/bpi_defconfig
sed -i 's/CONFIG_R8188EU=m/CONFIG_R8188EU=y/g' ~/linux-stable/arch/arm/configs/bpi_defconfig
Now everything is ready for compilation.
cd ~/linux-stable

export ARCH=arm
export CROSS_COMPILE=arm-linux-gnueabihf-
make clean
make bpi_defconfig
make -j8 dtbs
make -j8 uImage modules LOADADDR=0x40008000 INSTALL_MOD_PATH=output
make -j8 modules_install INSTALL_MOD_PATH=output
After successful compilation device-tree binary can be found at ~/linux-stable/arch/arm/boot/dts/sun7i-a20-bananapi.dtb, kernel image file (uImage) is located at ~/linux-stable/arch/arm/boot/uImage and modules are under ~/linux-stable/output/.
Boot script preparation
Boot script is the file that informs u-boot about the necessary settings, kernel and dtb locations. Run this.
cat <<END > ~/boot.cmd
setenv bootargs console=ttyS0,115200 console=tty0 consoleblank=0 loglevel=2 root=/dev/mmcblk0p2 rootwait panic=10
load mmc 0:1 0x43000000 sun7i-a20-bananapi.dtb
load mmc 0:1 0x42000000 uImage
bootm 0x42000000 - 0x43000000
END
To enable more boot messages you can also use the following but it impacts the performance.
setenv bootargs console=ttyS0,115200 console=tty0 consoleblank=0 loglevel=8 initcall_debug verbose debug root=/dev/mmcblk0p2 rootwait panic=10
The created boot.cmd must be converted into boot.scr with the following tool.
sudo mkimage -C none -A arm -T script -d ~/boot.cmd ~/boot.scr
RootFs for BananaPi
There are several ways to create a rootfs but obtaining one is a fast and the most reliable option for a start. Linaro provides rootfs for several distributions and versions and here is a Debian rootfs that works fine.
wget https://releases.linaro.org/debian/images/alip-armhf/16.04/linaro-jessie-alip-20160428-22.tar.gz -P ~/
Bootable SD card preparation
Environment setup
Here we have u-boot, boot script, device-tree-binary, uImage and rootfs in hand. Next step is gathering all together to create our bootable Banana Pi SDcard. First, define the source paths and directories.
export uboot=~/u-boot/u-boot-sunxi-with-spl.bin
export uimage=~/linux-stable/arch/arm/boot/uImage
export dts=~/linux-stable/arch/arm/boot/dts/sun7i-a20-bananapi.dtb
export bsp=~/linux-stable/output/
export firmware=~/linux-firmware/*
Plug your 4GB+ card to the machine (or virtual machine) and find the drive letter using lsblk. Export the card and p variables similar to one of the examples below.
export card=/dev/sdb
export p=
export card=/dev/mmcblk1
export p=p
Card partitions
Now we need to prepare the SD card partitions.
mkdir ~/mnt
sudo rm -rf ~/mnt/*
umount ${card}
umount ${card}${p}1
umount ${card}${p}2
sudo fdisk ${card} <<END
o
n


+32M
n


w
END
umount ${card}
umount ${card}${p}1
umount ${card}${p}2

sudo mkfs.vfat ${card}${p}1
sudo mkfs.ext4 ${card}${p}2<<END
y
END
Run the following commands to write u-boot to the disk.
sudo dd if=/dev/zero of=${card} bs=1k count=1023 seek=1
sudo dd if=${uboot} of=${card} bs=1024 seek=8
Partition-1 (boot partition)
Copy the contents to the card.
sudo mount ${card}${p}1 ~/mnt
sudo cp boot.scr ~/mnt/

sudo cp ${uimage} ~/mnt/
sudo cp ${dts} ~/mnt/
sudo umount ~/mnt
Partition-2 (rootfs partition)
Copy the contents to the card.
sudo mount ${card}${p}2 ~/mnt
sudo tar --strip-components=1 -xzpf ~/linaro-jessie-alip-20160428-22.tar.gz -C ~/mnt

sudo cp -r ${bsp}/* ~/mnt/
sudo mkdir -p ~/mnt/lib/firmware/
sudo cp -r ${firmware} ~/mnt/lib/firmware/
Partition table
Some final touches are necessary for the card to work properly. First we need to create/etc/fstab file.
sudo sh -c 'cat<<END > ~/mnt/etc/fstab
proc            /proc           proc    defaults             0       0
/dev/mmcblk0p1  /boot           vfat    defaults,rw          0       2
/dev/mmcblk0p2  /               ext4    defaults,noatime     0       1
END'
Network settings
This part is for network connectivity. By default NetworkManager takes care of the network and enables DHCP on eth0 but in example if you want to assign a static ip address to your board, use the following part after changing the settings and uncommenting necessary lines. If you have no idea, ignore the following.
sudo sed -i 's/managed=false/managed=true/g' ~/mnt/etc/NetworkManager/NetworkManager.conf
sudo sh -c "echo manual > ~/mnt/etc/init/network-manager.override"

sudo sh -c 'cat<<END > ~/mnt/etc/network/interfaces
auto lo
iface lo inet loopback
#auto eth0
#allow-hotplug eth0
#iface eth0 inet dhcp
#iface eth0 inet static
#address 192.168.137.208
#netmask 255.255.255.0
#gateway 192.168.137.1
#auto wlan0
#allow-hotplug wlan0
#iface wlan0 inet dhcp
# wpa-ssid YOUR_WIFI_NAME
# wpa-psk YOUR_PASSWORD
END'
Keyboard settings
To change the default keyboard layout, one can use the following part with the desired language.
sudo sed -i 's/XKBLAYOUT="us"/XKBLAYOUT="tr"/g' ~/mnt/etc/default/keyboard
sudo sed -i 's/XKBLAYOUT=us/XKBLAYOUT=tr/g' ~/mnt/usr/share/console-setup/keyboard
Other settings
The following lines are also required.
sudo sh -c "echo BananaPI > ~/mnt/etc/machine-id"
sudo ssh-keygen -q -t rsa -f ~/mnt/etc/ssh/ssh_host_rsa_key -C '' -N ''

# Bugfix for Linaro
sudo chmod +x ~/mnt/usr/lib/dbus-1.0/dbus-daemon-launch-helper
Now finalize the partition.
sudo umount ~/mnt
sudo sync
sudo rm ~/boot.cmd
sudo rm ~/boot.scr
sudo rm -rf ~/mnt
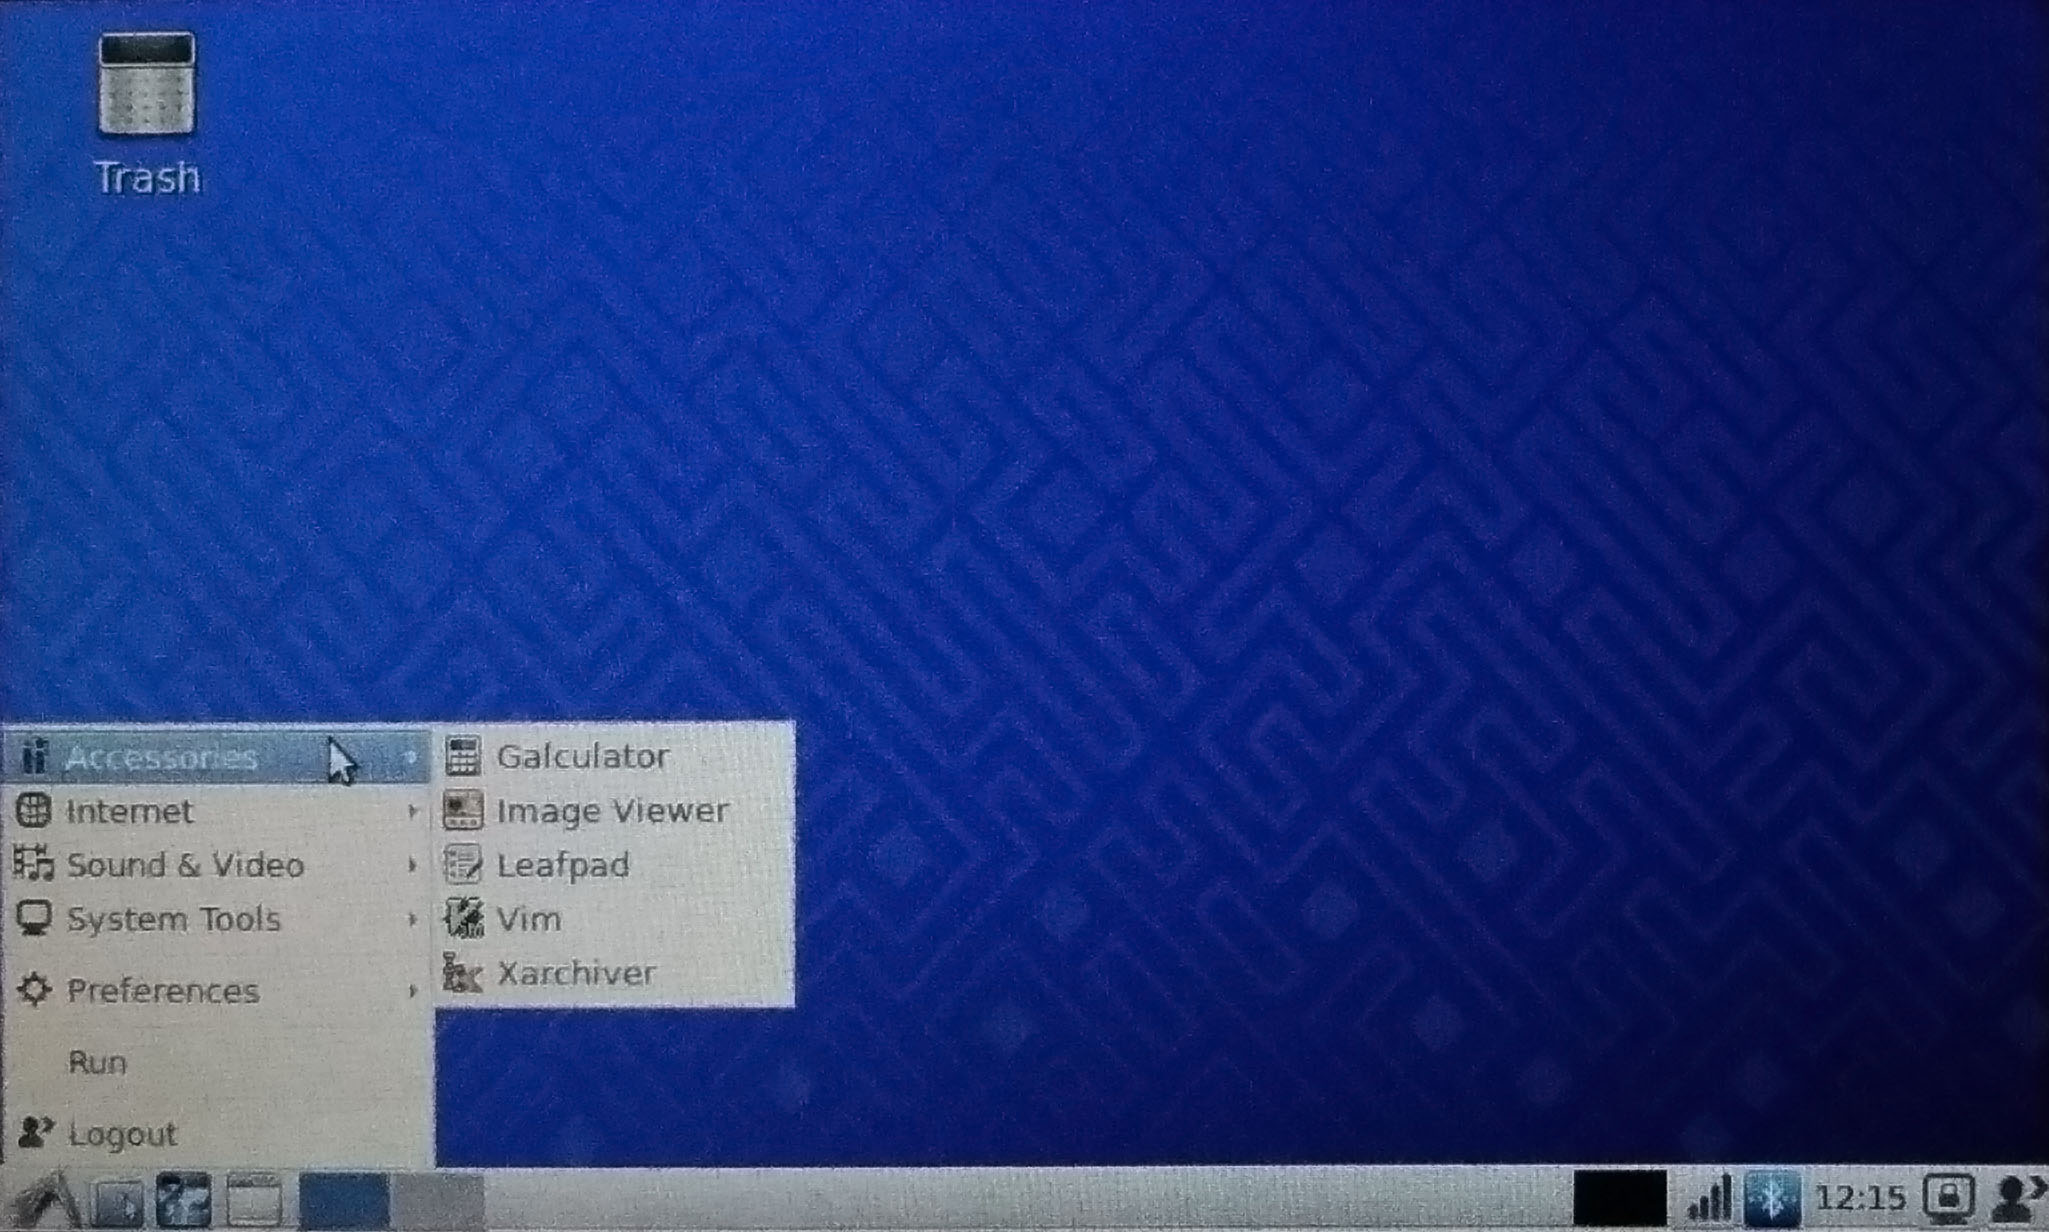
First boot
Assuming you have done every step correctly, the next thing to do is plugging the SDcard to your BananaPi and see the result of your patience ?


Final words
This tutorial explains the most basic steps to compile a mainline kernel and u-boot then using an instant rootfs from Linaro project. The next step would be preparing a rootfs using debootstrap or preparing a bootable image file rather than writing directly to the card. I will try to add new titles to this post when i find time. Keep informed and have fun ?